Guides
A Guide to Using Google Ads Editor
There is a lot to learn in the world of pay-per-click, especially in your first six months in the industry. Reflecting on mine, and the tools which have made my job easier, Google Ads Editor has to be my number one.
Google Ads Editor is a free tool which allows you to work offline and make bulk changes to your Google Ads accounts. Being offline is really useful because not only do you not need internet access, but also you can fiddle around with your campaigns as much as you like without fear of making a mistake (when you do just right click it and hit revert).
There are so many ways to use this tool that going through them all could take until Christmas (it’s June). So below I have summarised three ways that I regularly use Google Ads Editor, and how these actions could save you time.
What you will learn:
- Getting Started with Google Ads Editor
- Changing Ad Schedules in Bulk
- Changing Keyword Bids
- Creating New Campaigns from Old Ones
Getting Started
Before we dive in, if you haven’t already downloaded Editor, you can do here.
Once that’s done, you will need to download your Google accounts too. You do this by clicking on “Accounts” and then the “+ Add” button.
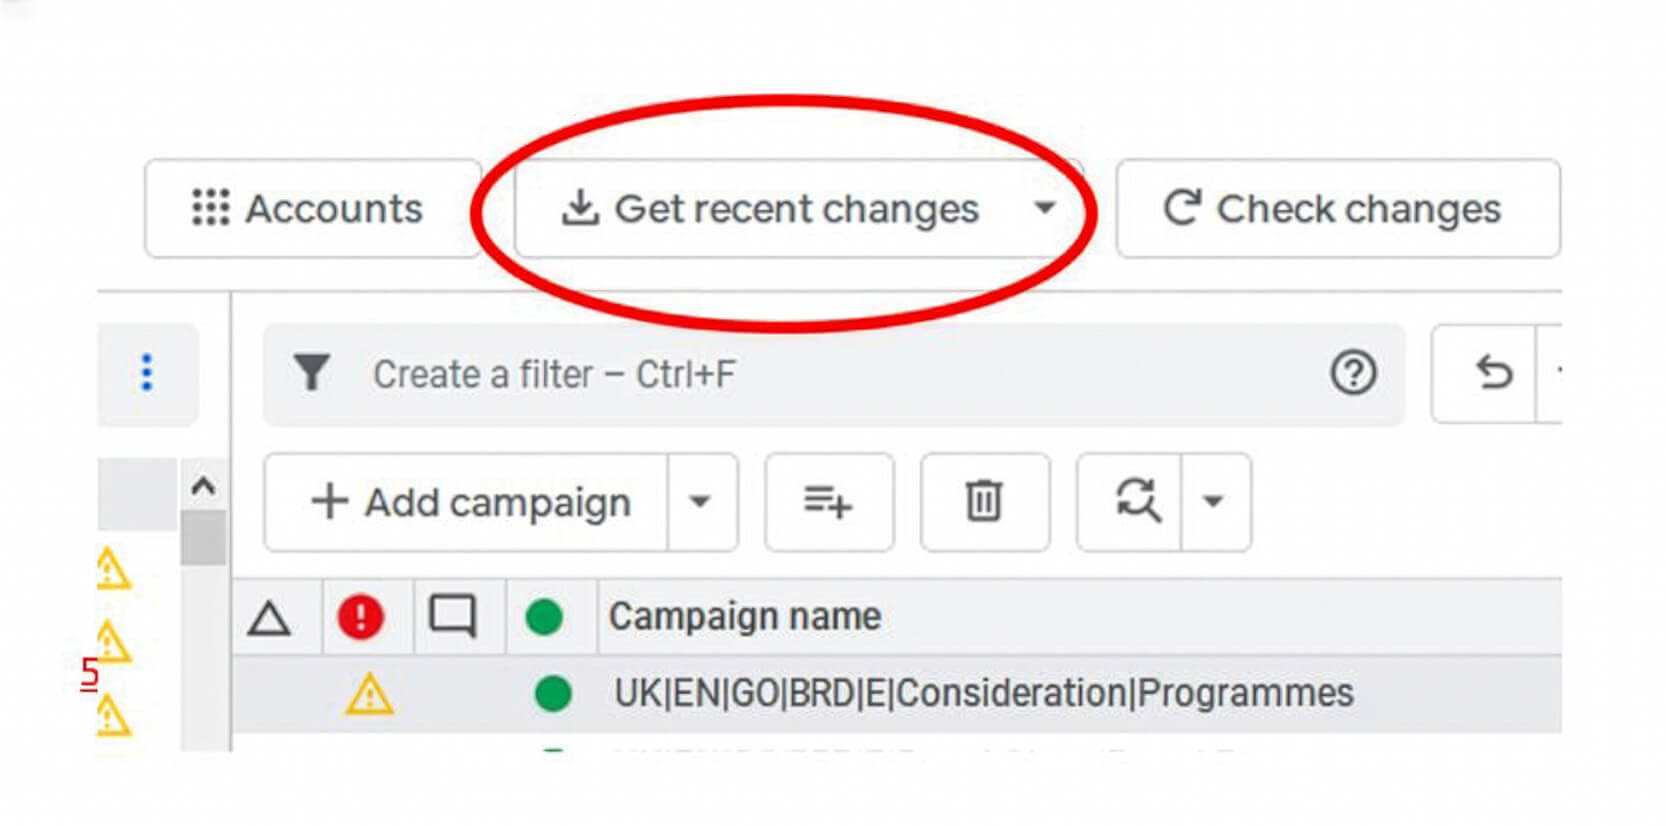
Lastly, before you start editing like a pro, always remember to click “Get recent changes”. This will allow you to see any changes that have been made since your last download.
Changing Ad schemes in bulk
Creating new ad schedules in Google Ads can be time consuming, especially if you’re using a lot of bid adjustments for different times of day/days of the week.
I like to create just one schedule using Google ads and then use Editor to copy and paste it across the rest of the account.
To do this, firstly create your new ad schedule in Google Ads in one campaign and remember which one.
Then open the account in Editor and click “Get recent changes” – make sure you click “More Data” and not “Basic” otherwise the new ad schedule won’t appear.
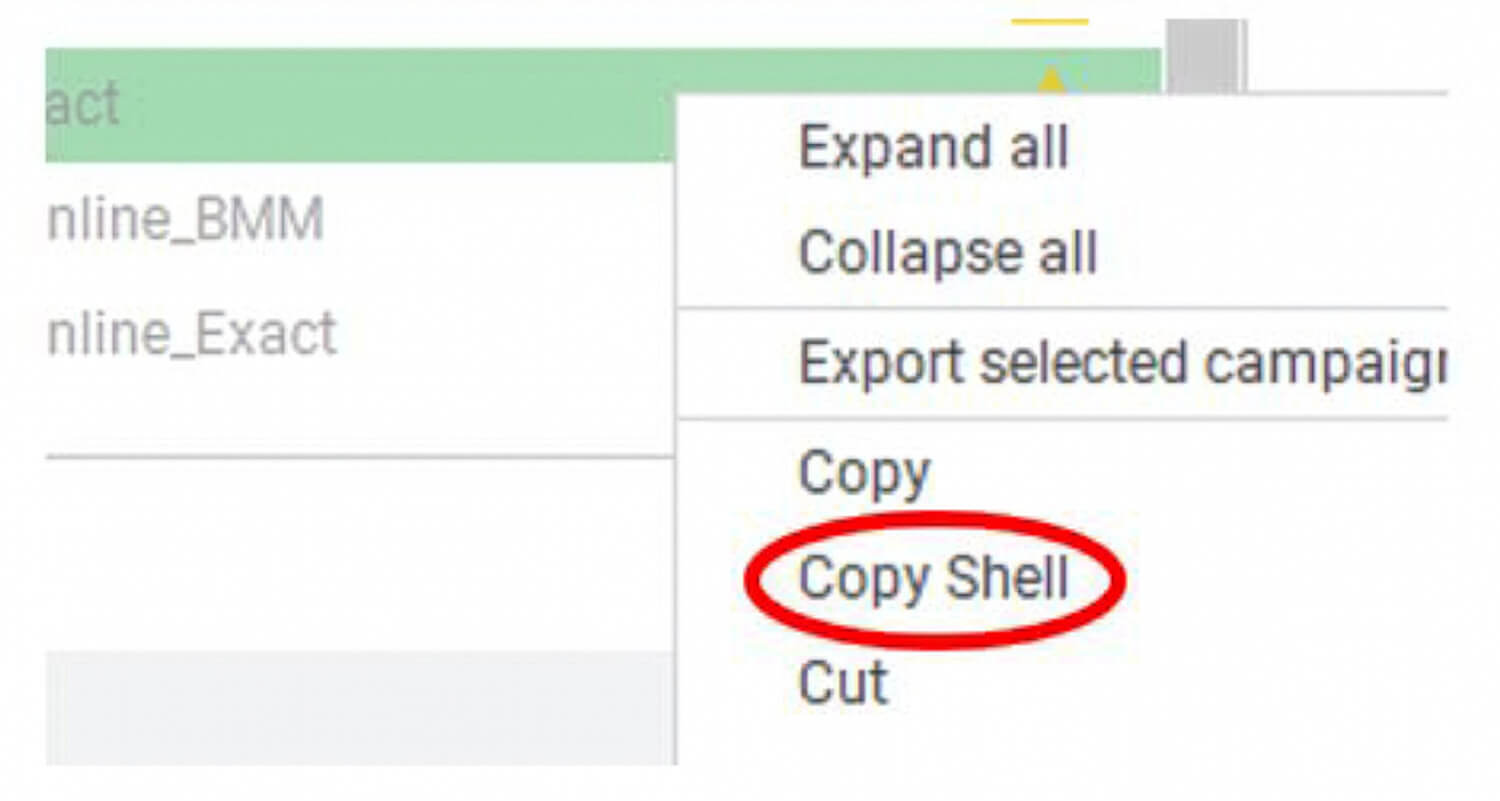
Find the campaign with the new schedule, it should be highlighted in green as it has just been downloaded.
Then right-click the campaign and select “Copy Shell”.
Next, highlight all the other campaigns where you would like this new schedule applied.
Then in the right-hand bar under “Edit selected campaigns” move down to “Ad schedule” and click the clipboard icon next to it.
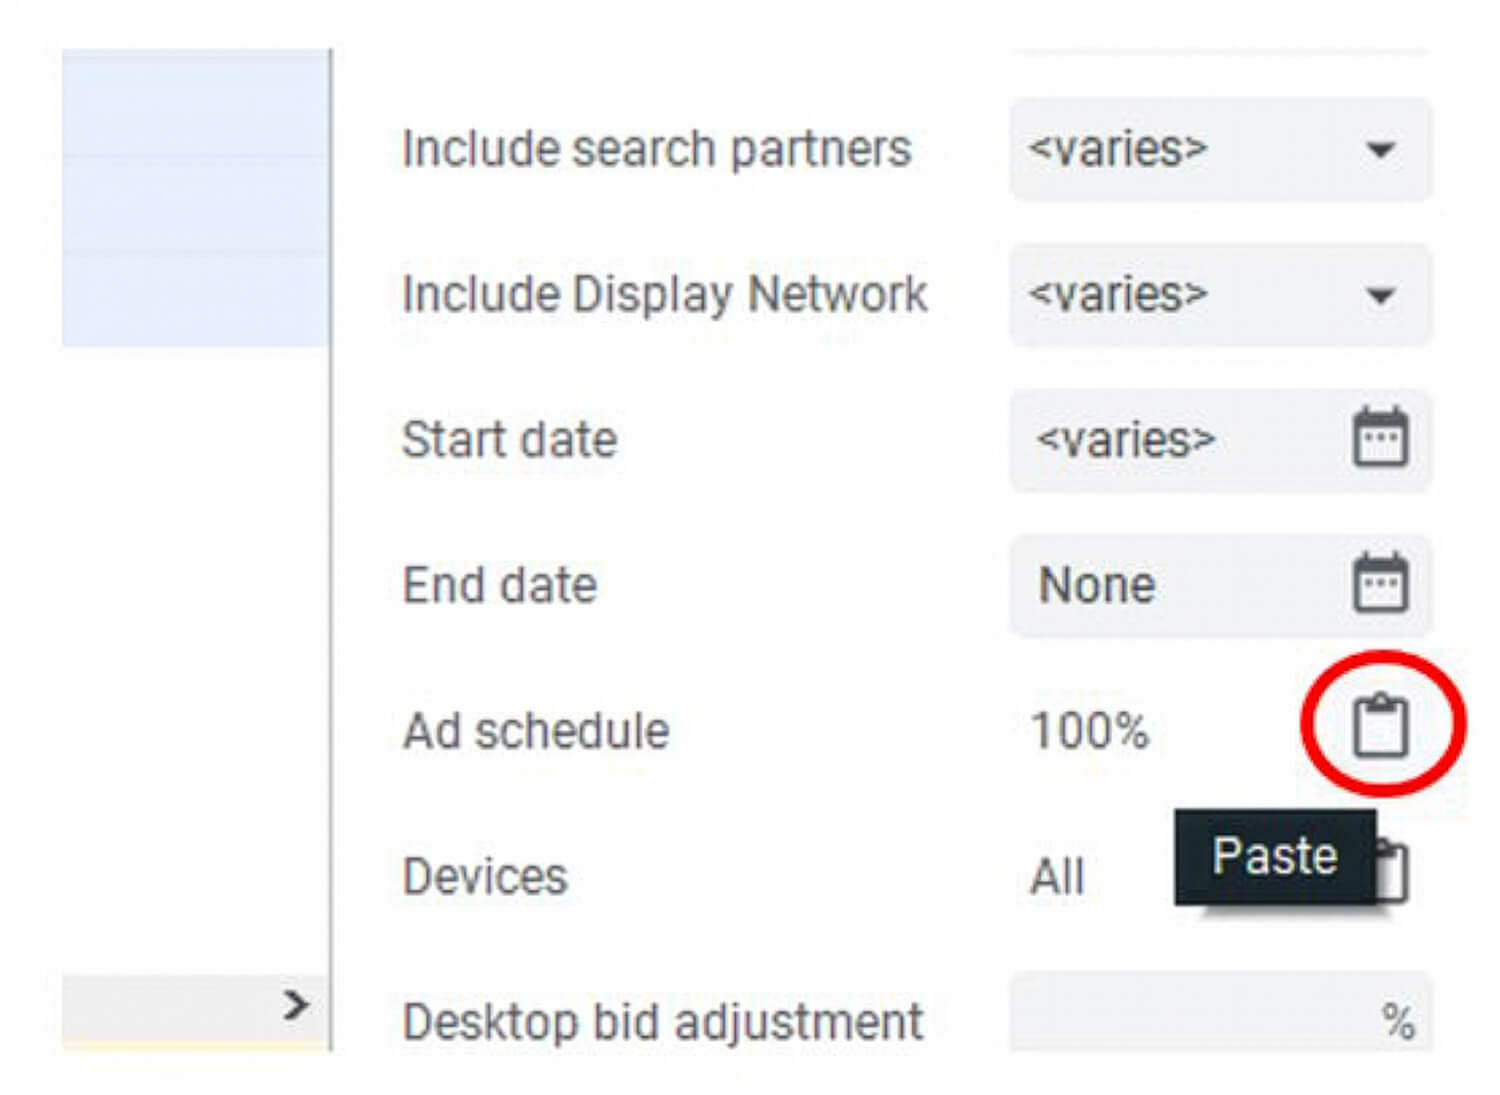
This will paste the new schedule into selected campaigns and a purple triangle should appear next to the campaigns to show they have been edited.
Changing keyword bids
If I am optimising keywords to a metric not on Google Ads and am calculating this elsewhere, then I will often create lists of keywords and their bid adjustments on Excel.
To then action this on Google Ads would mean finding each keyword individually to alter the bid. However, on Editor, I can paste in a list of keywords from Excel and change all the bids at once.
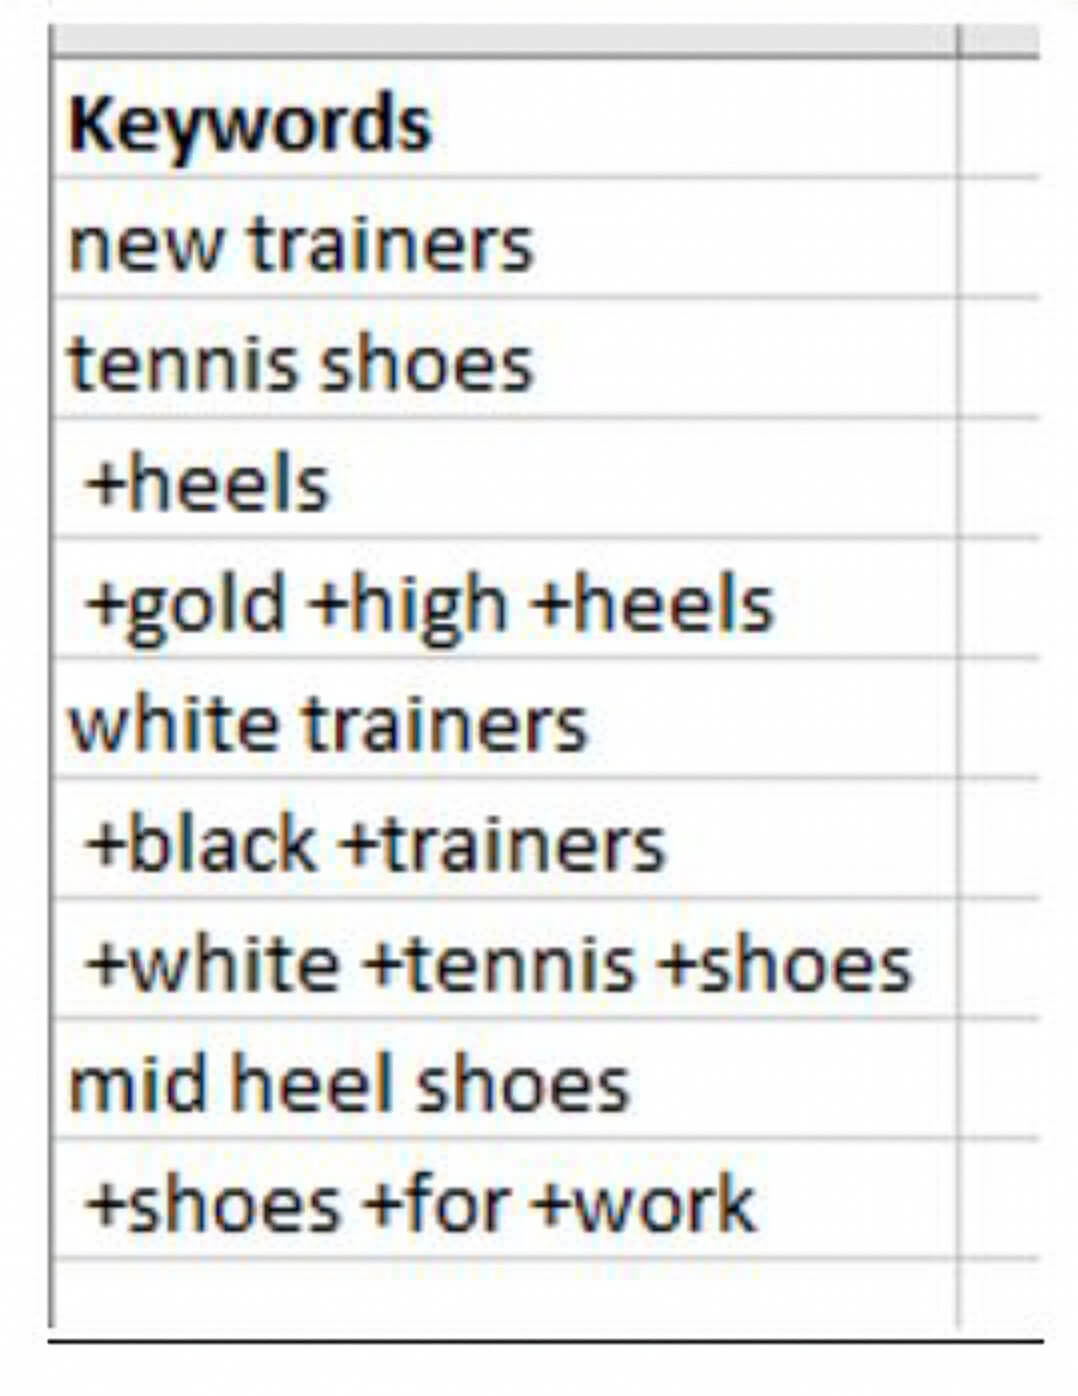
To do this, firstly prepare your list in Excel. Make sure for BMM keywords you include the “+” sign before each word and that exact match keywords don’t have any brackets:
Next, copy your list and open Editor. Select your account and navigate to keyword level in the bottom left bar under “Manage”. You should now see all the keywords in your account.
Click the “Create a Filter” bar and from the drop-down menu and select “Keyword”.
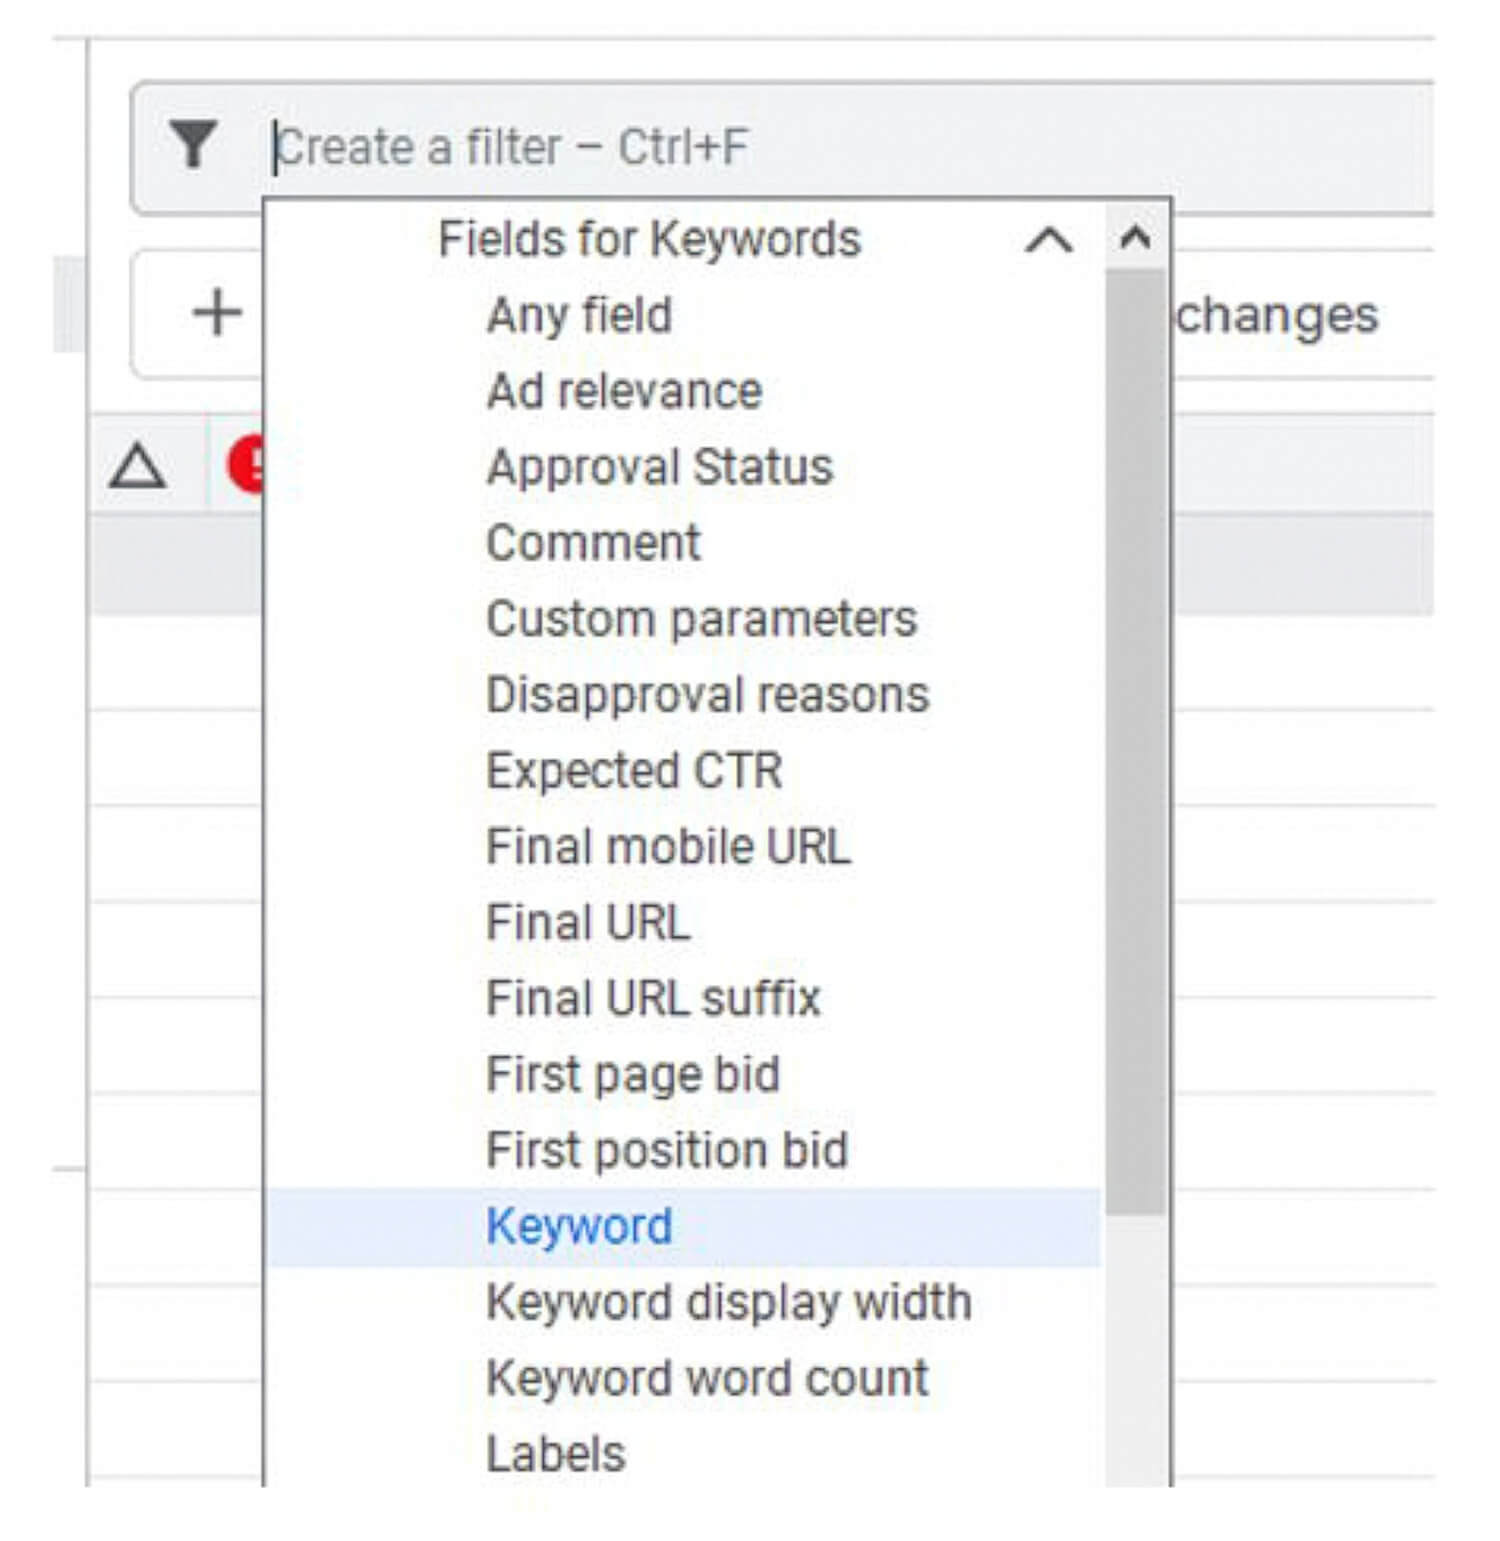
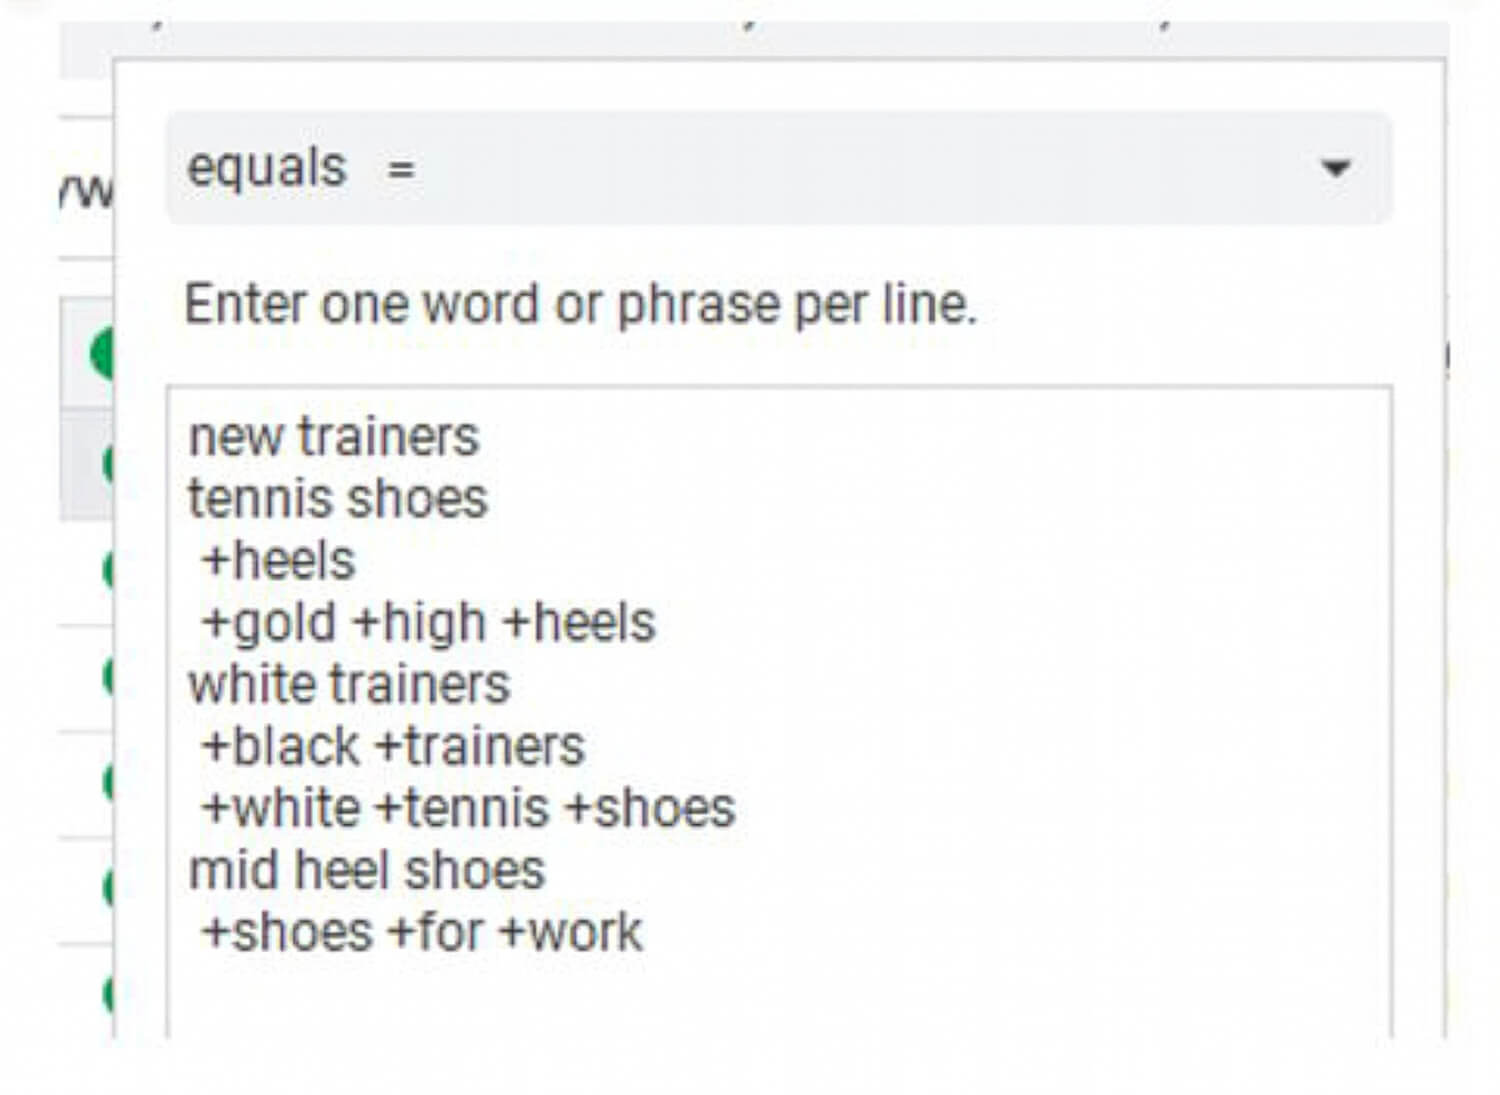
A box will appear where you can paste your list of keywords, make sure you change the bar above from “contains any of” to “equals”, so only the specific keywords you want will be found.
Now you’ve filtered for your keywords, select them all and right-click. Then from the drop-down bar select “Change bids”.
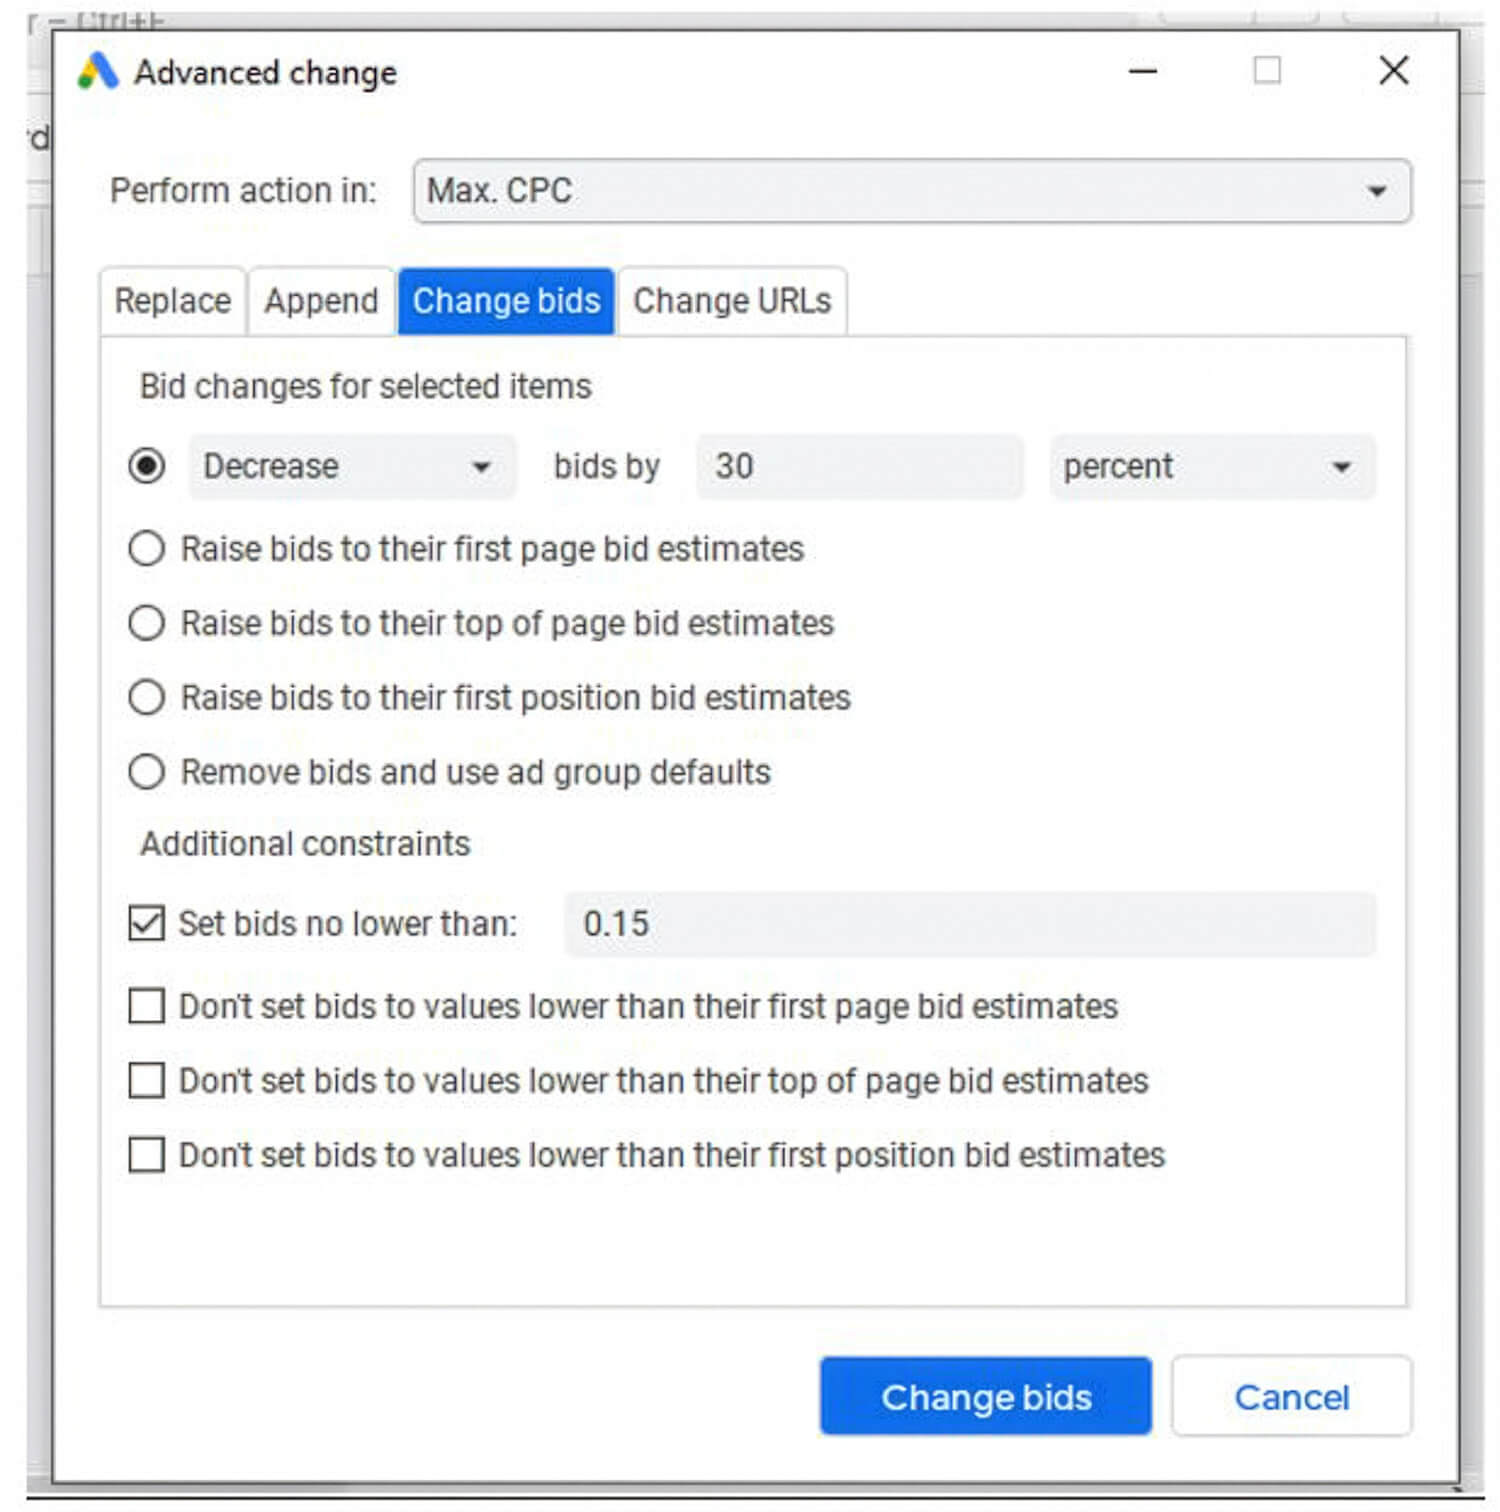
Now the “Advance change” window will appear, and you can increase or decrease your bids by a percentage or by a set amount and set lower bid limits.
Creating new campaigns from old ones
Creating new campaigns from old ones is especially useful if your campaigns have extensive location or audience targeting, as it means you don’t need to repeatedly go through the process of setting these up.
Start in Editor and at campaign level select a current campaign that is most similar to the new one you want to create.
Then simply right-click and select copy and then past the campaign below.
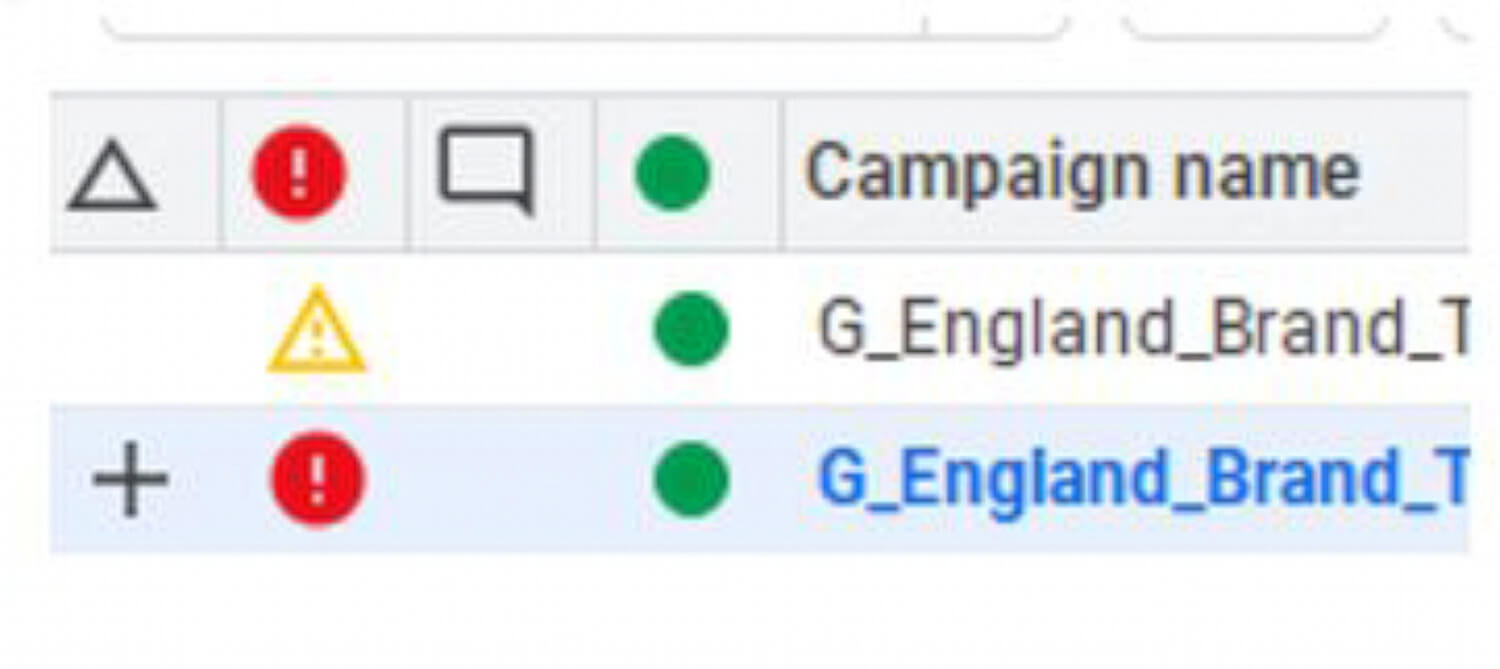
Now your new campaign will appear with a red exclamation mark beside it. This is because both campaigns have the same name.
Next, you will want to go through each level of the new campaign and make your desired changes. Start at campaign level and edit the name and then any other features, for example, the budget or the bid strategy.
Then move onto Ad group level and again change the name and any other features here like the default max bid. You can then progress through keywords, targeting, ads and extensions. Each time changing what you need.
I would advise going through each part in order to make sure you don’t forget to change anything.
Also, if you are changing URLs, make sure you do this at both keyword and ad level.
Wrapping up
One last thing to note, once you have finished editing always make sure you hit “Check changes” as this will allow you to see any errors that might have occurred. Then when your happy just hit “Post”.
This is just a taste of all the ways Google Ads Editor can save you time and help you manage your Google Ads campaigns. I suggest downloading it now and finding more ways for yourself!